L’Shanah Tova! I know I’ve been MIA lately, but after traveling to Florida for two weeks, followed by two weeks in New York, celebrating Harley’s 1st birthday, and packing up our place [while working full time], I am S-T-R-U-G-G-L-I-N-G!!! We move before the end of the month and have SO much more to do! It’s been a challenge to be productive while caring for a baby, and now that she’s walking, climbing and non-stop moving, it’s practically impossible. With that being said, it has been amazing watching Harley grow, learn and develop. I am truly in awe by her [and borderline obsessed]. Oh, and congrats to Chelsey from Nebraska for winning Harley’s Giveaway! Thank you to everyone who participated! Wish I could spoil you all!
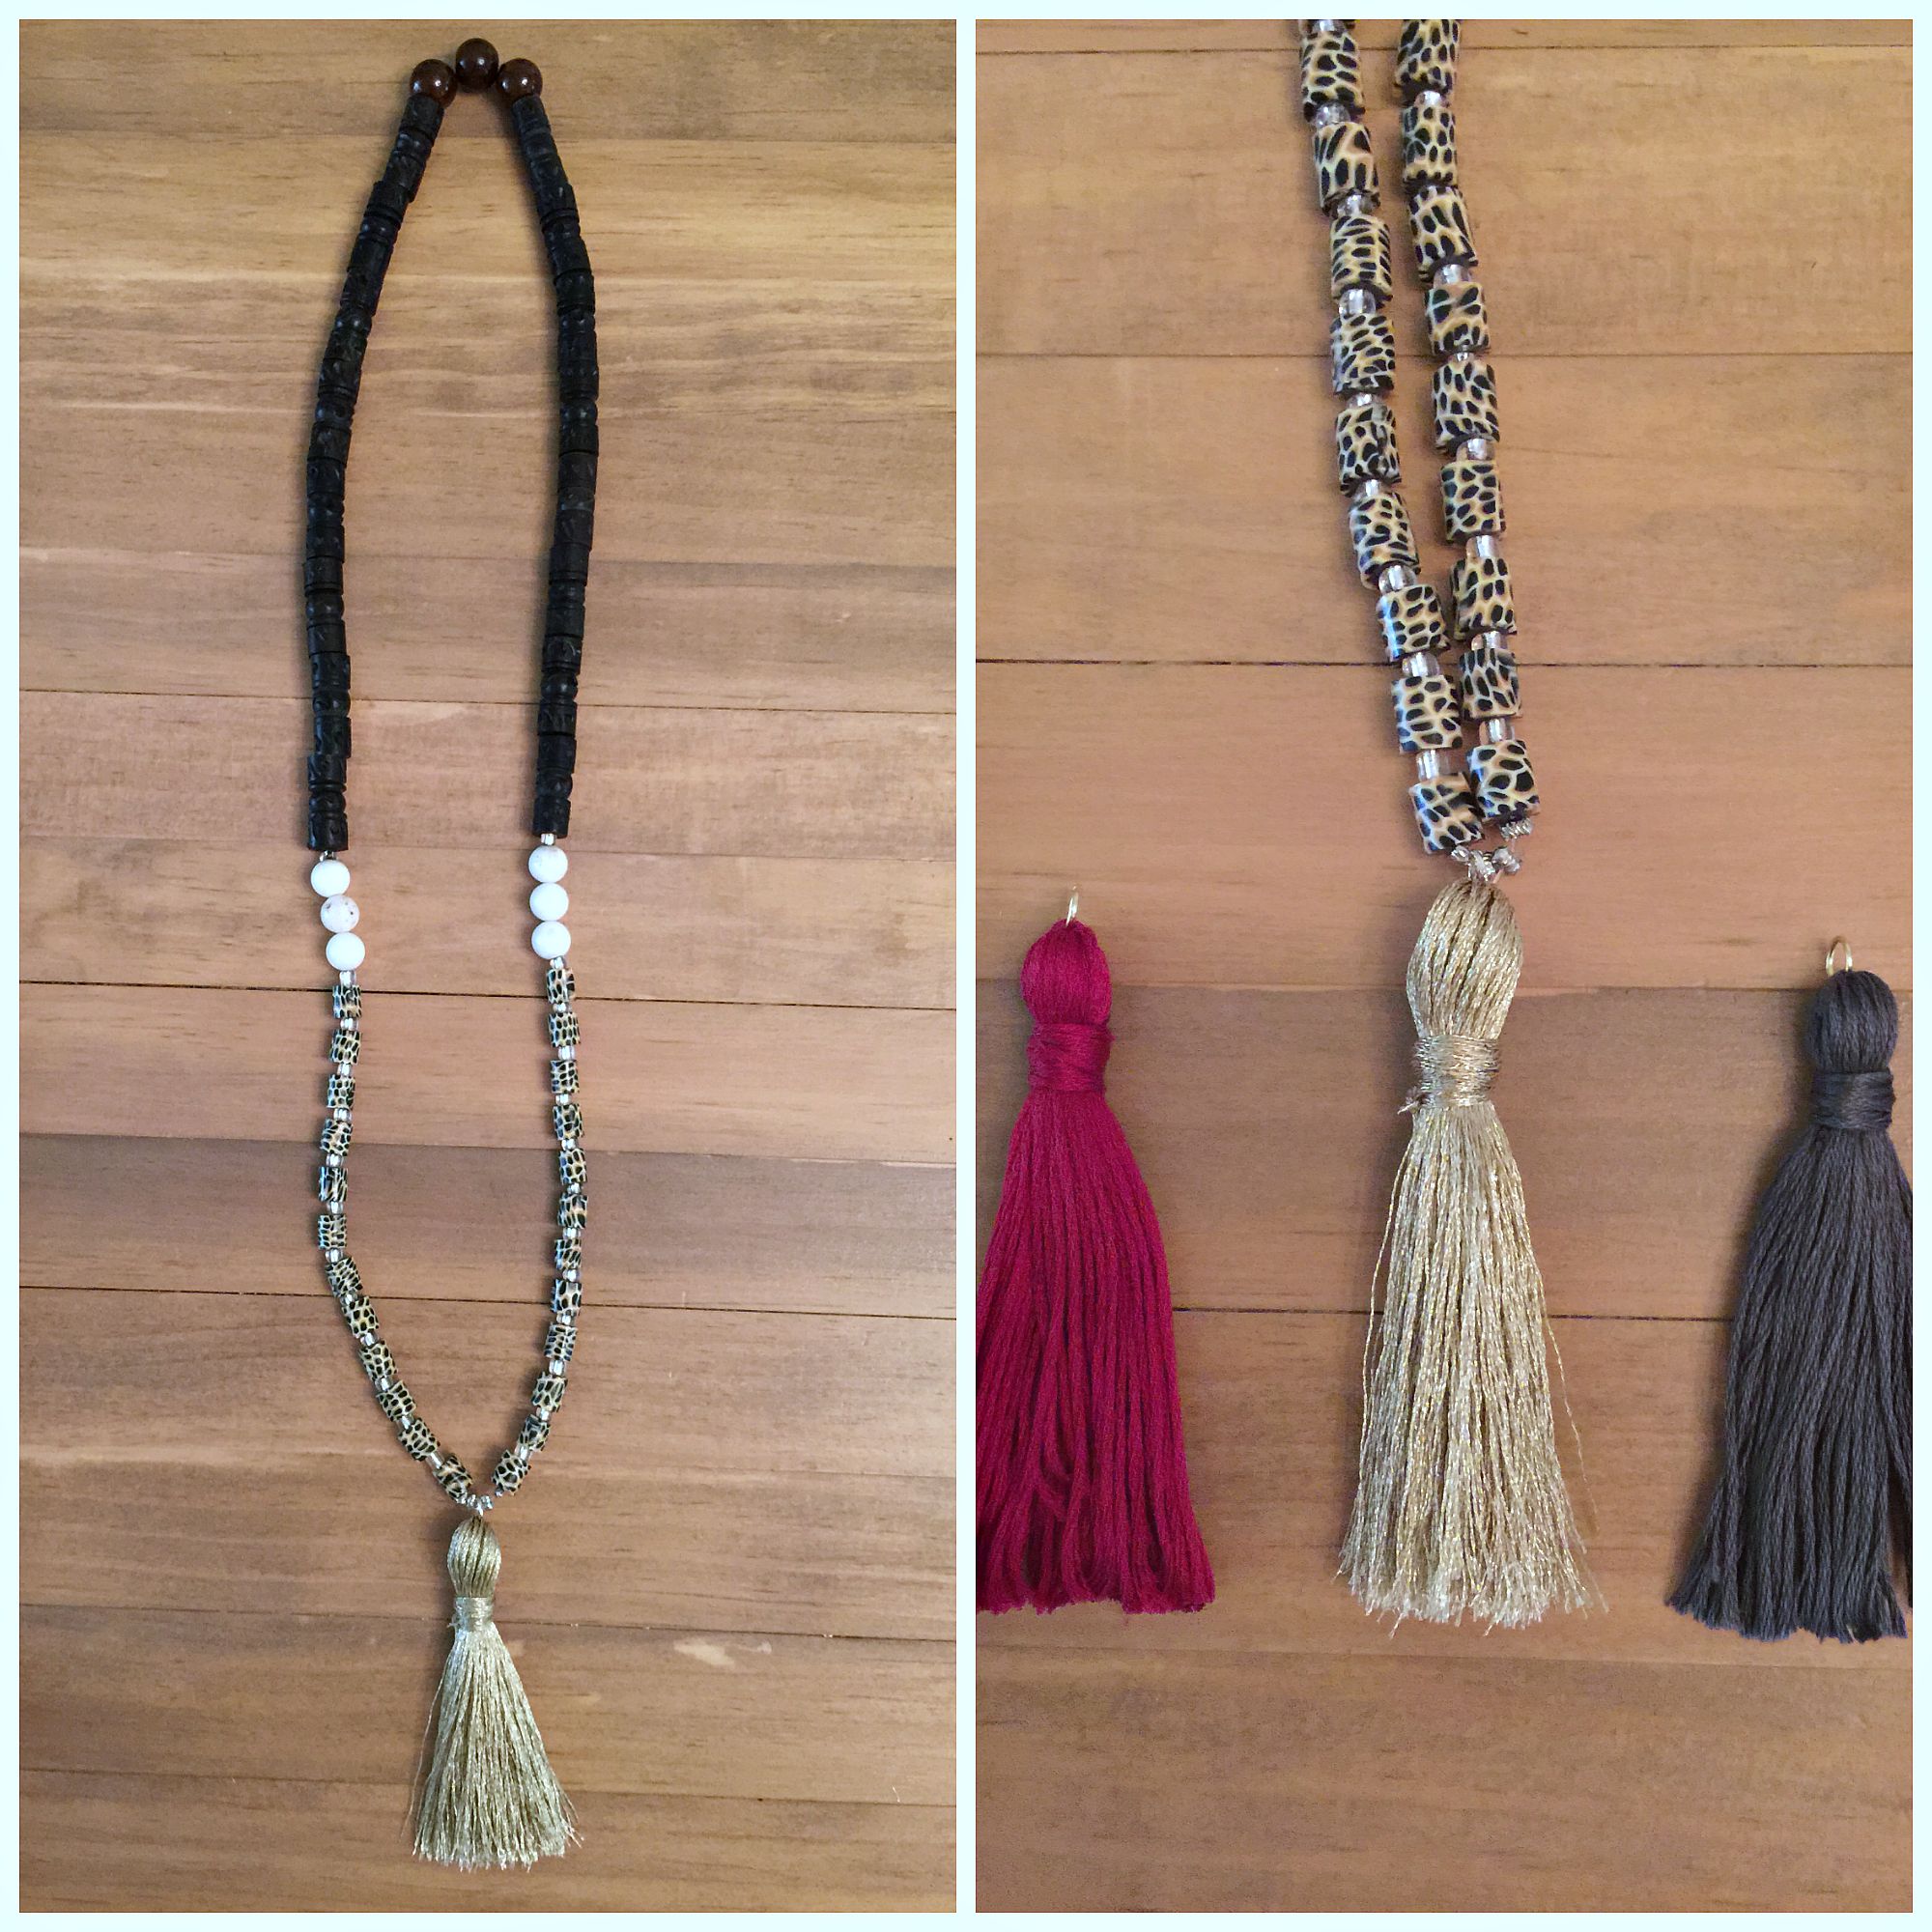
Awhile back, I had promised a tutorial for the beaded tassel necklaces my sister, Samantha and I made so am super excited that this post is finally up! A video tutorial will be in the works once I’m settled in Florida as I find them easier to learn from, but hopefully this explanation makes sense to you!
Tassel necklaces, bracelets, and earrings are everywhere, in all different colors and materials. The ones I have are more suited for Summer and even though Fall doesn’t technically begin until September 23rd, it was 60 degrees this morning and I am so ready to take in this perfect Charlotte weather as much as possible before the move. I have yet to drink a Pumpkin Spice latte, but did however get my first mani/pedi of the season and couldn’t be more excited about that! [Lincoln Park After Dark is my go to shade, but I went with Cashmere Kind of Gal on my hands and Cement the Deal on my toes]. Anyway… so, I went to Michael’s to get more Fall/Winter appropriate color beads and embroidery thread. They had a huge selection to choose from and fortunately all of the beads were 50% off! Michael’s frequently has sales, in addition to coupons, so I would highly recommend signing up for their newsletter to take advantage of the discounts. I would also encourage you to keep the receipt and take the tags/packaging off as you use each item. The first time around, I went a little cray cray and left the store spending almost $100 with things I was never going to use. The whole point of DIY-ing is to get creative, make something your own, while also saving money!
This necklace is simple to make, but I can’t tell you how many times I have made a mistake, so do not get frustrated or discouraged! Just yesterday, as I was basically finished with one, I did something so stupid on the very last step. Beads went flying everywhere and I frantically cleaned them up before my child attempted to eat them [because yes, she puts everything in her mouth]! If only there was a hidden camera! Haha!!
So lets get started!
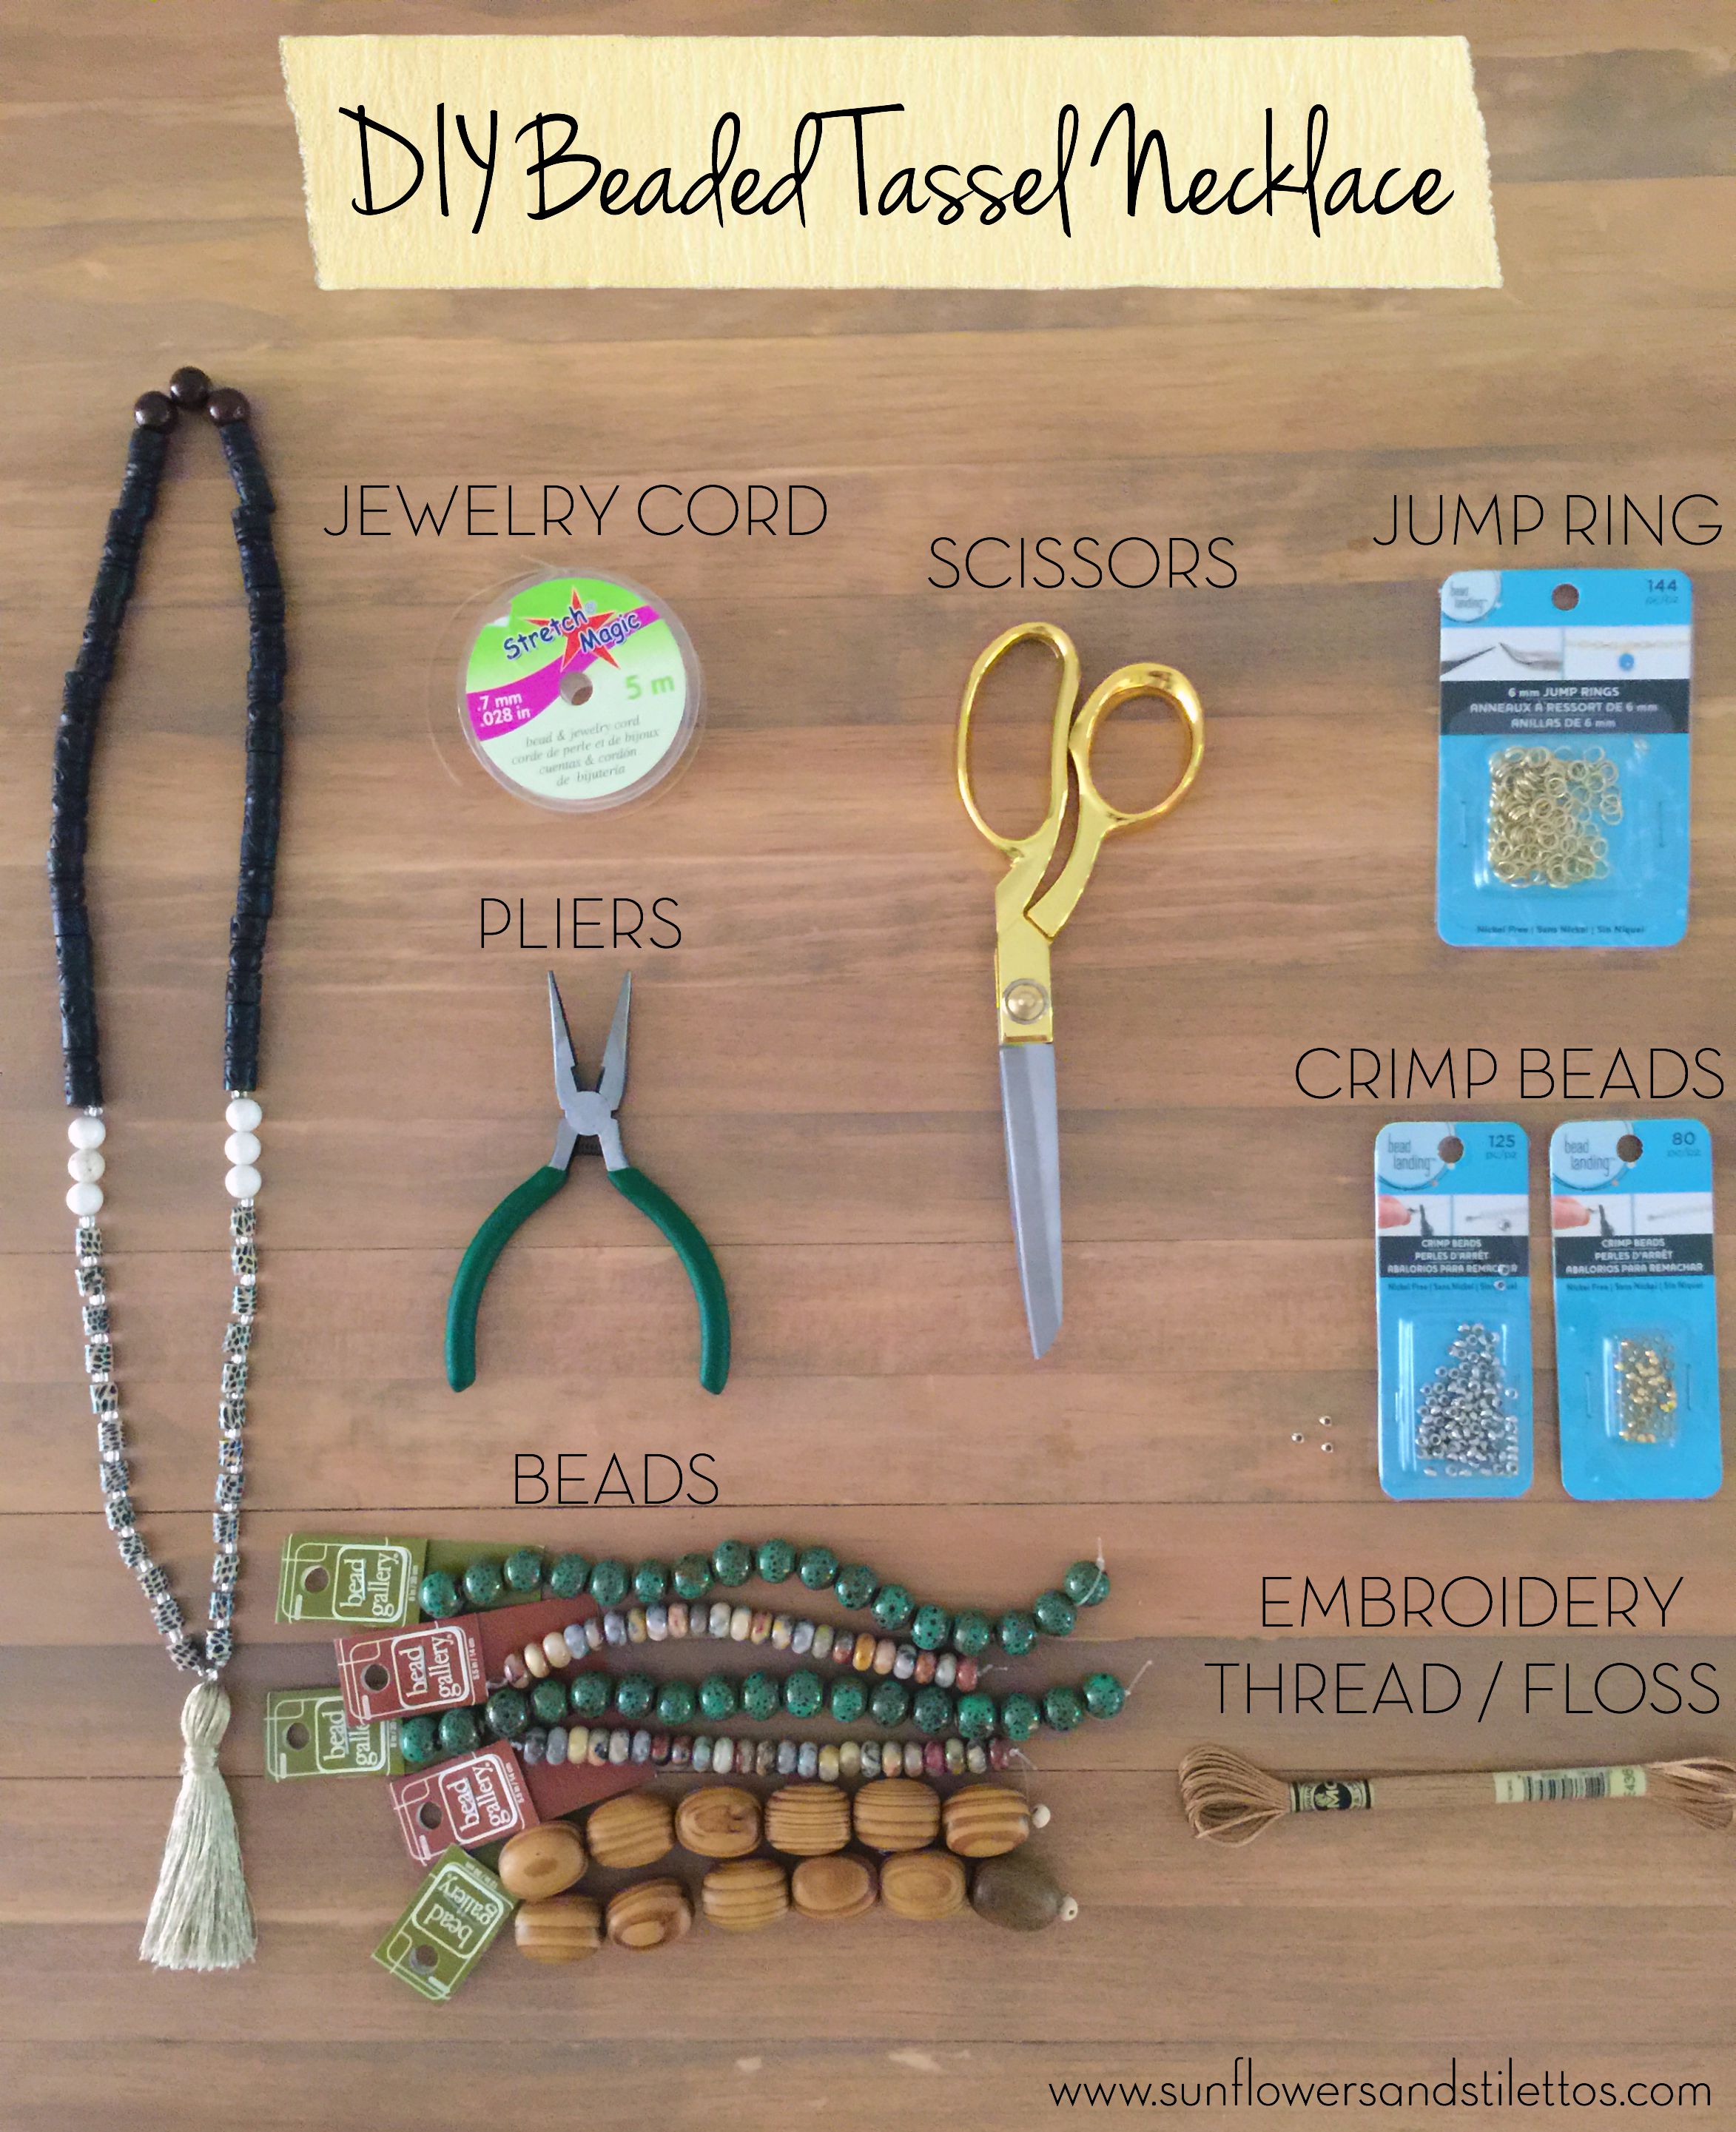
You will need:
- Jewelry Cord / String. I really like this Stretch Magic because it’s strong and allows for some stretch [duh], which is perfect if you plan on making bracelets or shorter necklaces.
- Pliers
- Scissors [the sharper the better]
- Beads [the amount can vary depending on the length of your necklace, but I used about 5 strands]
- Jump Ring [1]
- Crimp Beads [4]
- Embroidery Thread / Floss [1]
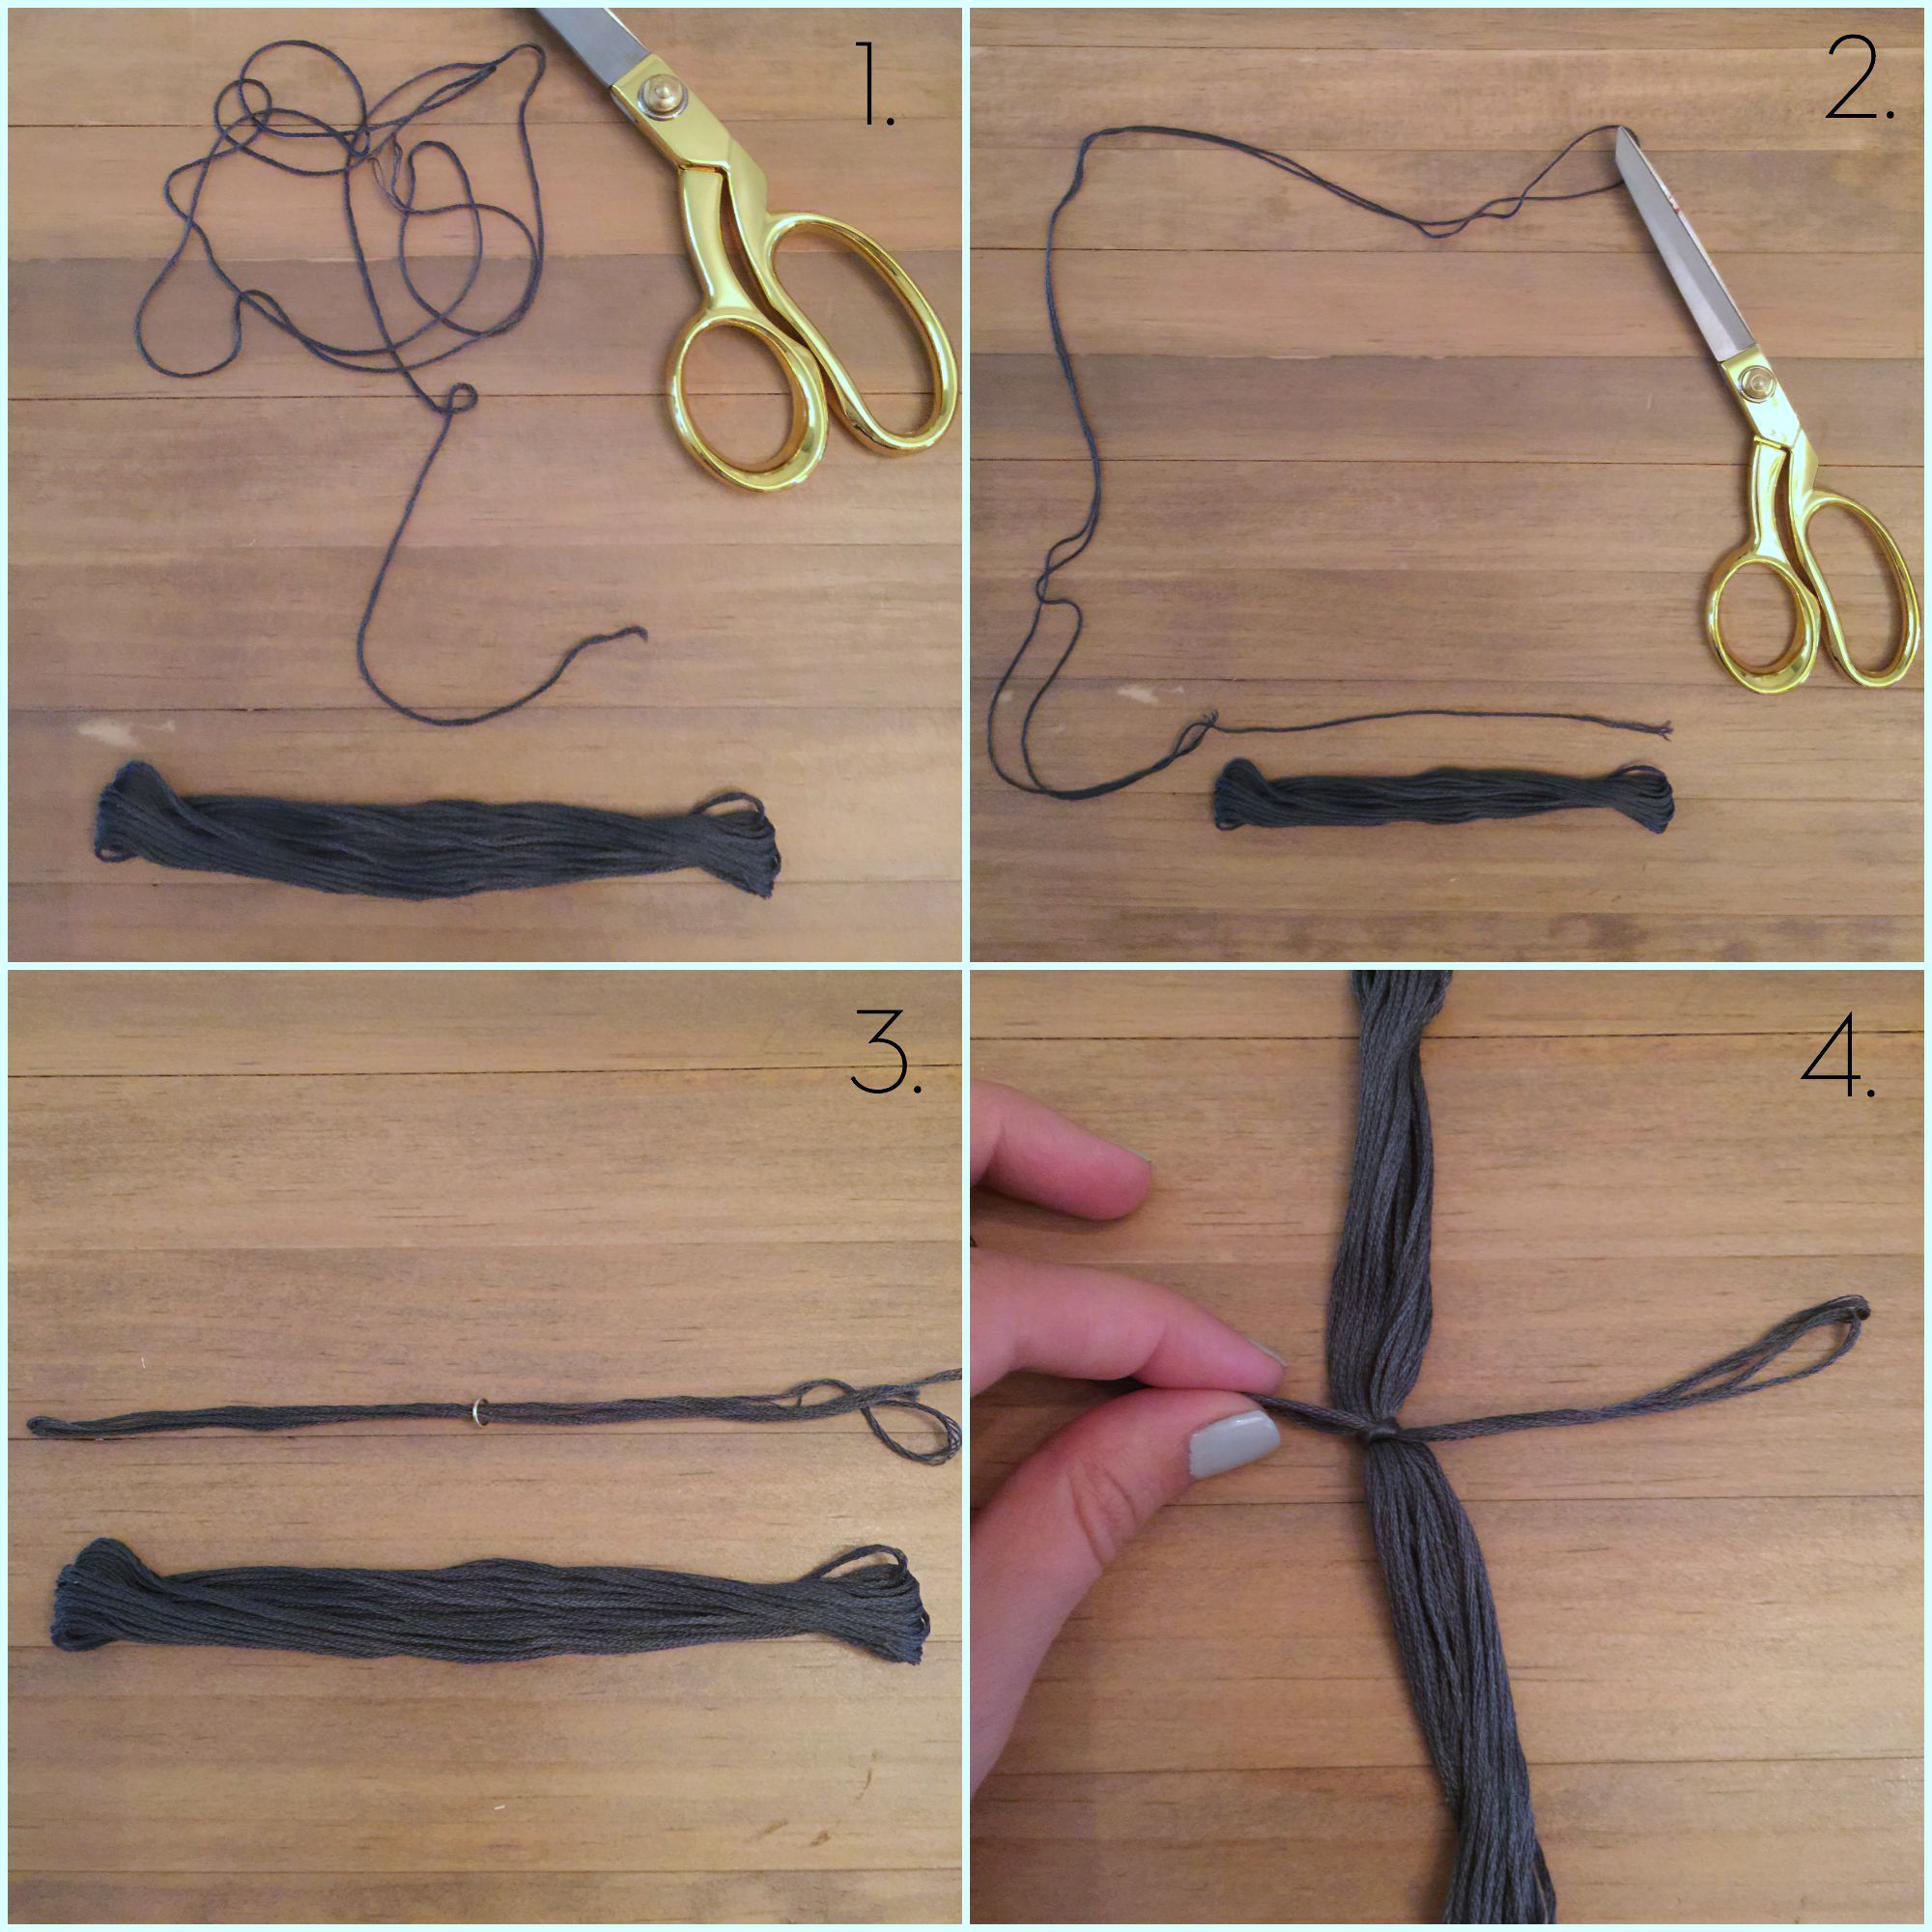
Step 1: Remove the wrapper from the embroidery thread while keeping the shape intact and all the strands together. Find one of the ends and carefully go back and forth the length of the embroidery thread 8 times, then cut that piece off.
Step 2: Take the piece you just cut off and fold it in half. Adjust it so that it’s off center and one side is longer than the other. The side that is longer should be longer by the exact length of the embroidery thread. Cut that piece to create two pieces of floss. Place the shorter piece off to the side for now.
Step 3: Take the longer piece and fold it in half. Fold it in half again. Place one jump ring in the center by sliding the folded piece of floss through it.
Step 4: Take the embroidery thread [still keeping all the strands together] and turn it perpendicular, placing it on top of the jump ring. Now tie the folded piece twice on the embroidery thread. Make sure it is tight and secure.
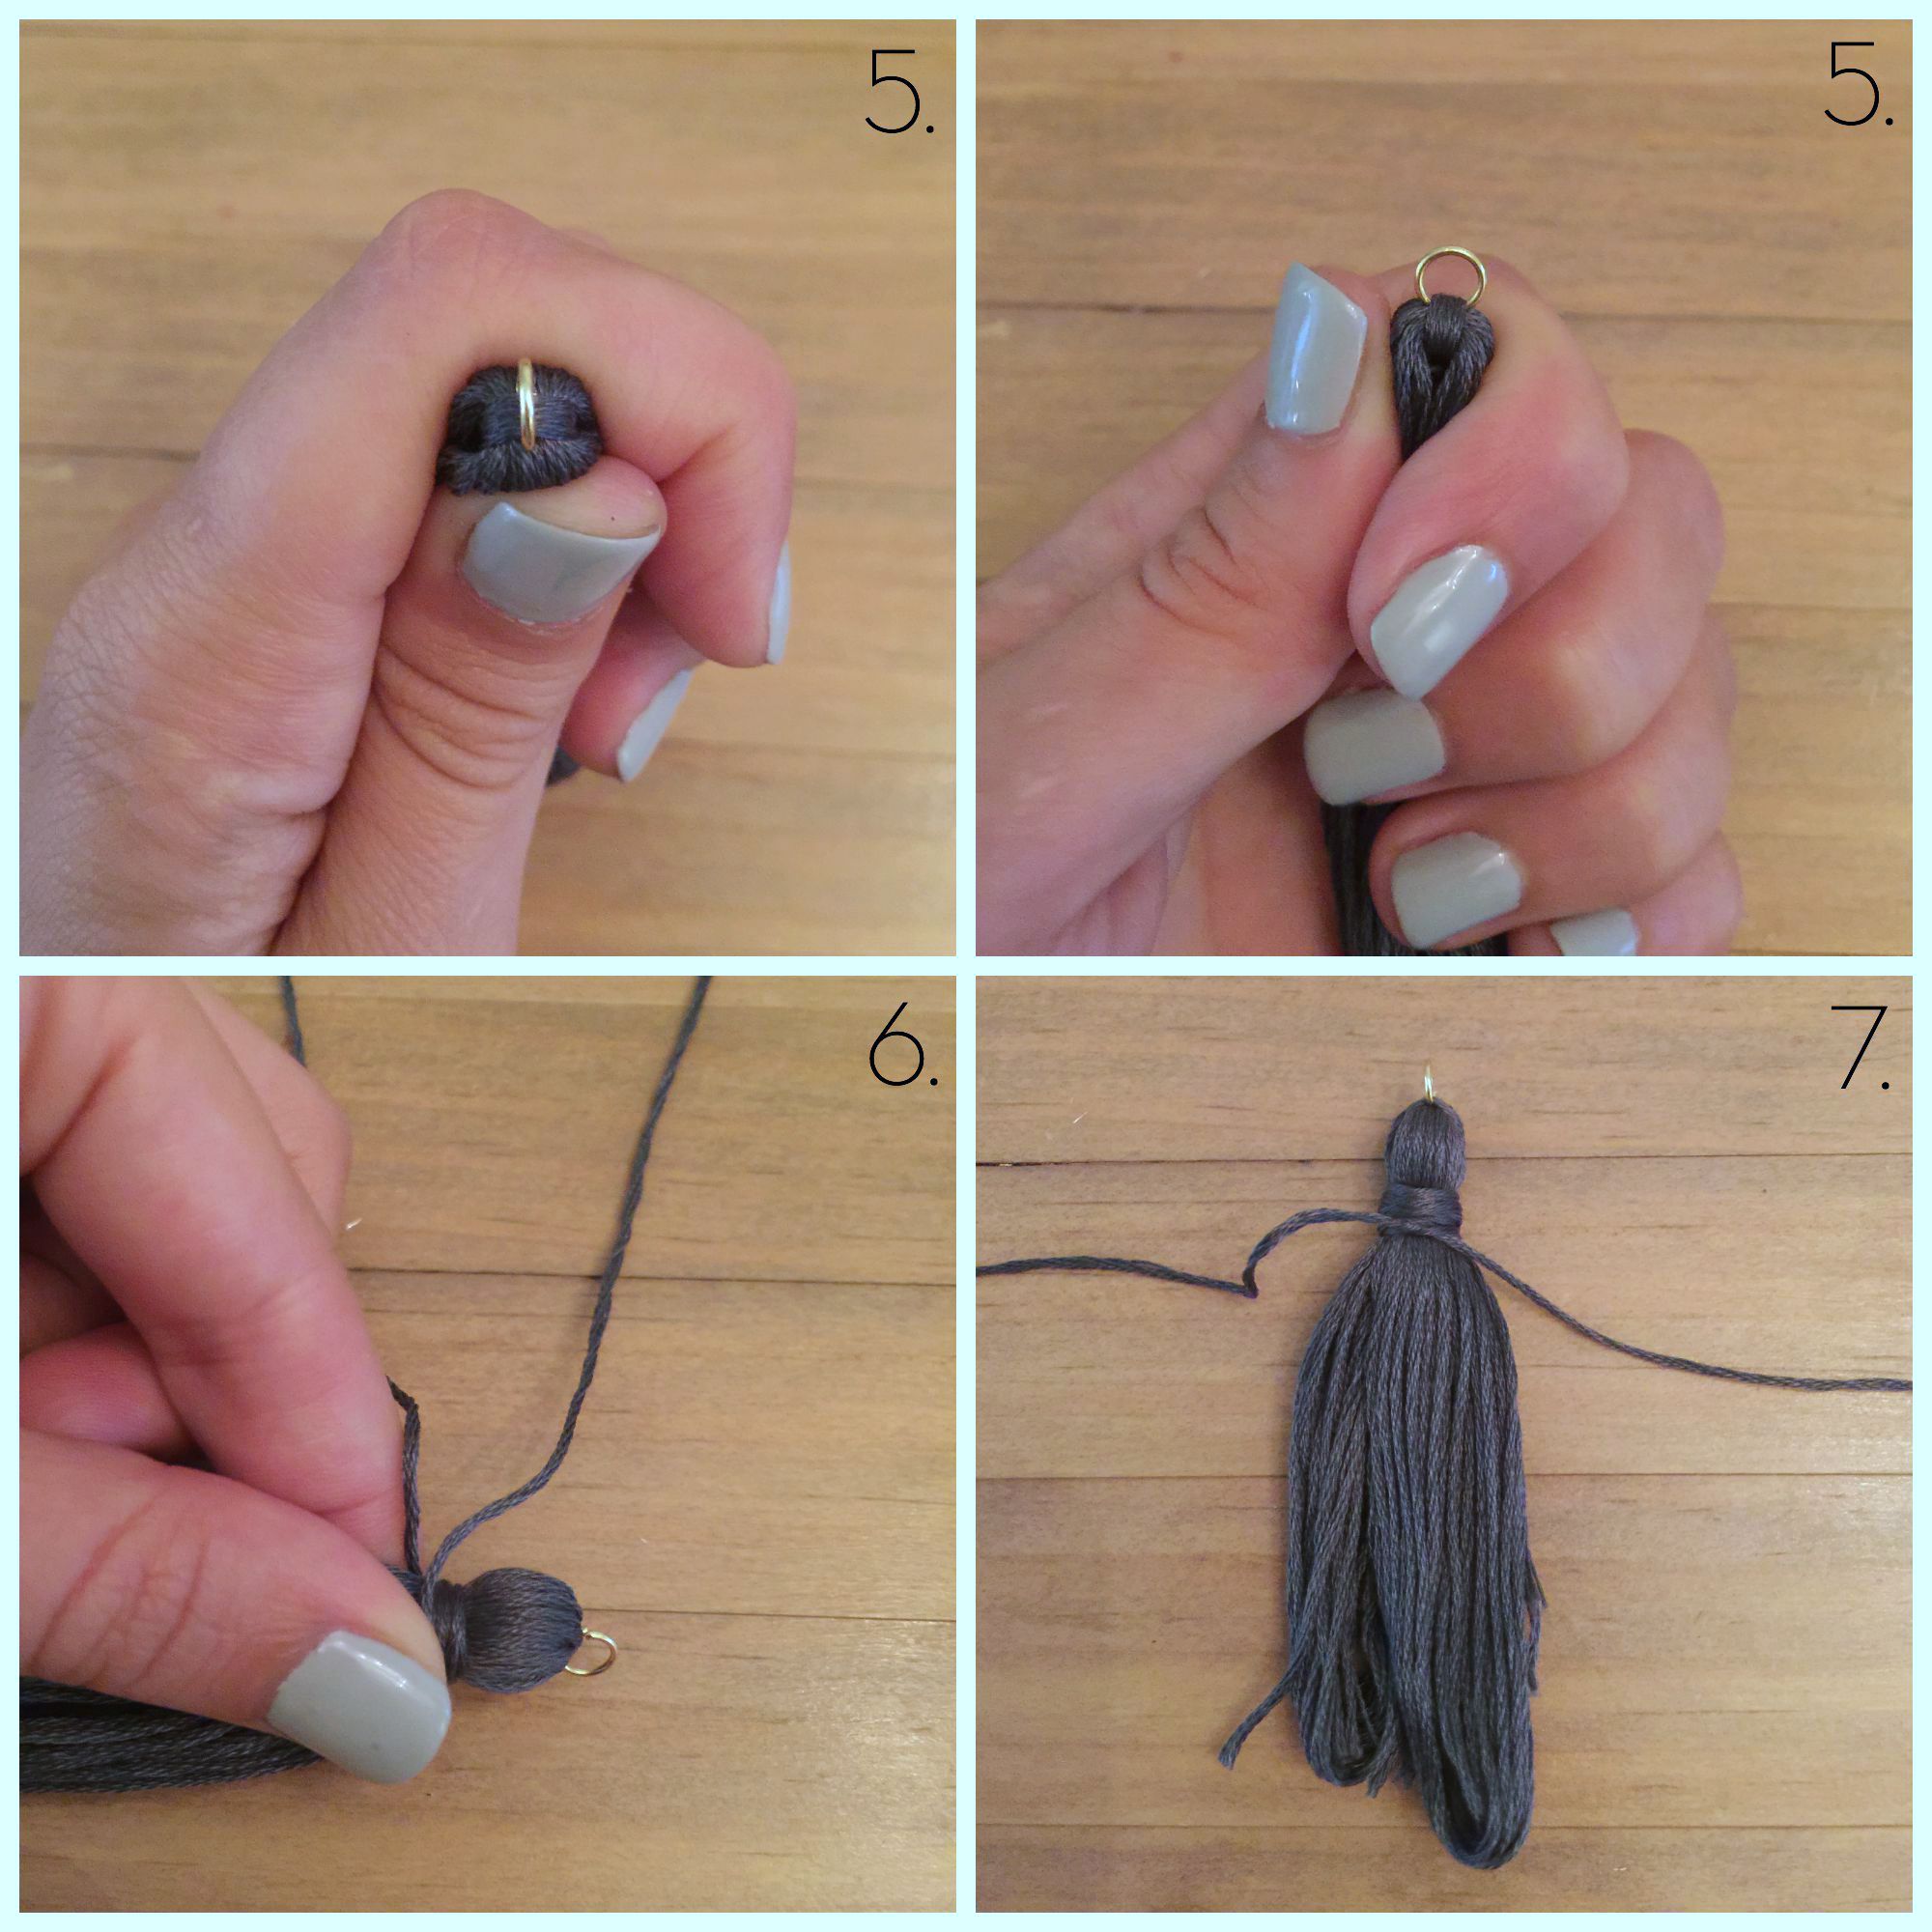
Step 5: Fold down the embroidery thread so that both sides are touching. The jump ring should be centered. You might have to adjust it slightly, however, it shouldn’t be easy to move. If it’s loose, then you didn’t tie the folded piece tight enough, so redo Step 4.
Step 6: Holding the embroidery thread tight in one hand, pinch a little down from the jump ring to create the head of the tassel. In the other hand, carefully take the small piece of thread that was cut in Step 2 and start to wrap it where you’re pinching. You will have to use the hand holding the embroidery thread for support. Since I’m right handed, I had my left thumb holding down the embroidery thread and piece of floss while I wrapped the floss tightly around and around with my right hand. When you wrap the thread, leave about two inches or more unwrapped on either side so you can tie a knot at the end. As you wrap it, be sure to keep the head of the tassel neat and smooth. It can easily get messy, so take your time and adjust the strands as needed. Also – for a different look, I have used thin metal wire that bends easily. Michael’s sells it in the same aisle as the jewelry cord.
Step 7: Once you have wrapped it around several times and decide you like the way it looks [while also making sure it is secure], tie a knot very tightly. If you pull it tight enough, the knot can almost get hidden underneath. Tie it a second time for extra security. Cut the excess floss as close to the knot as possible. The sharper the scissors, the better.
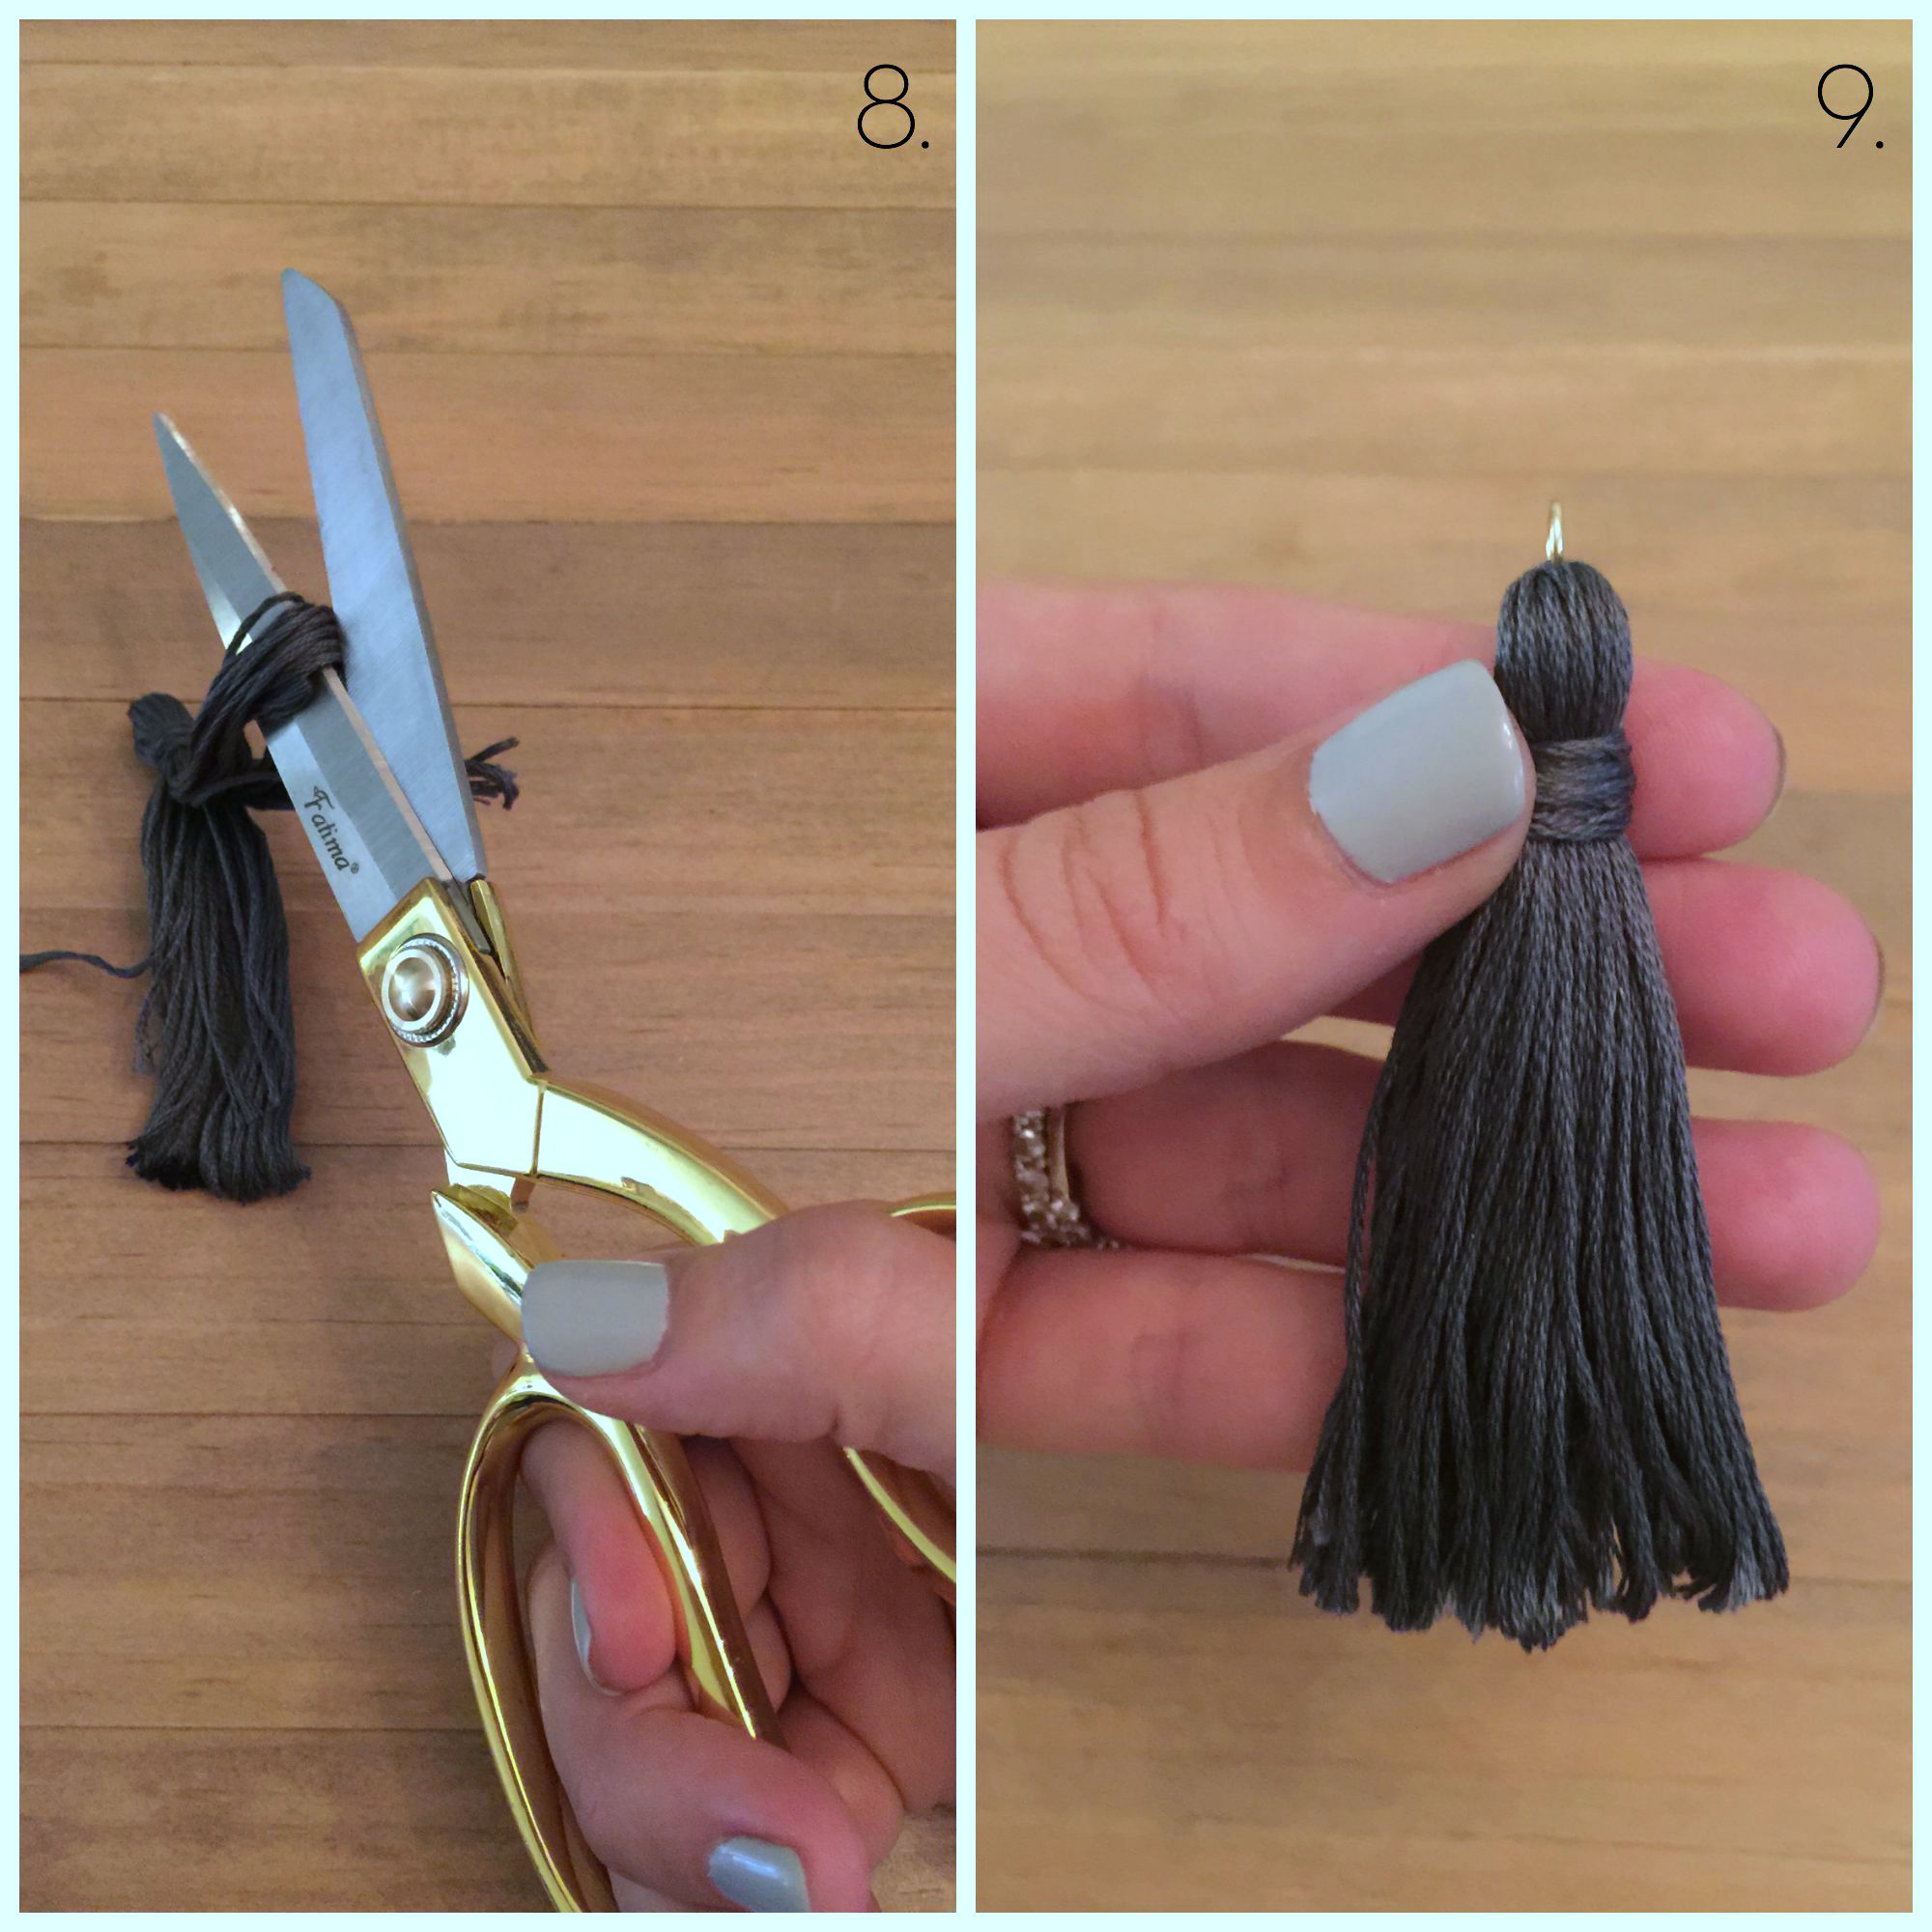
Step 8: With your scissors, un-loop the bottom of the tassel. I find it easier to cut each side separately.
Step 9: Decide what is going to be the “front” of the tassel and then cut the bottom to make it as even as possible. Again, the sharper the scissor the better!
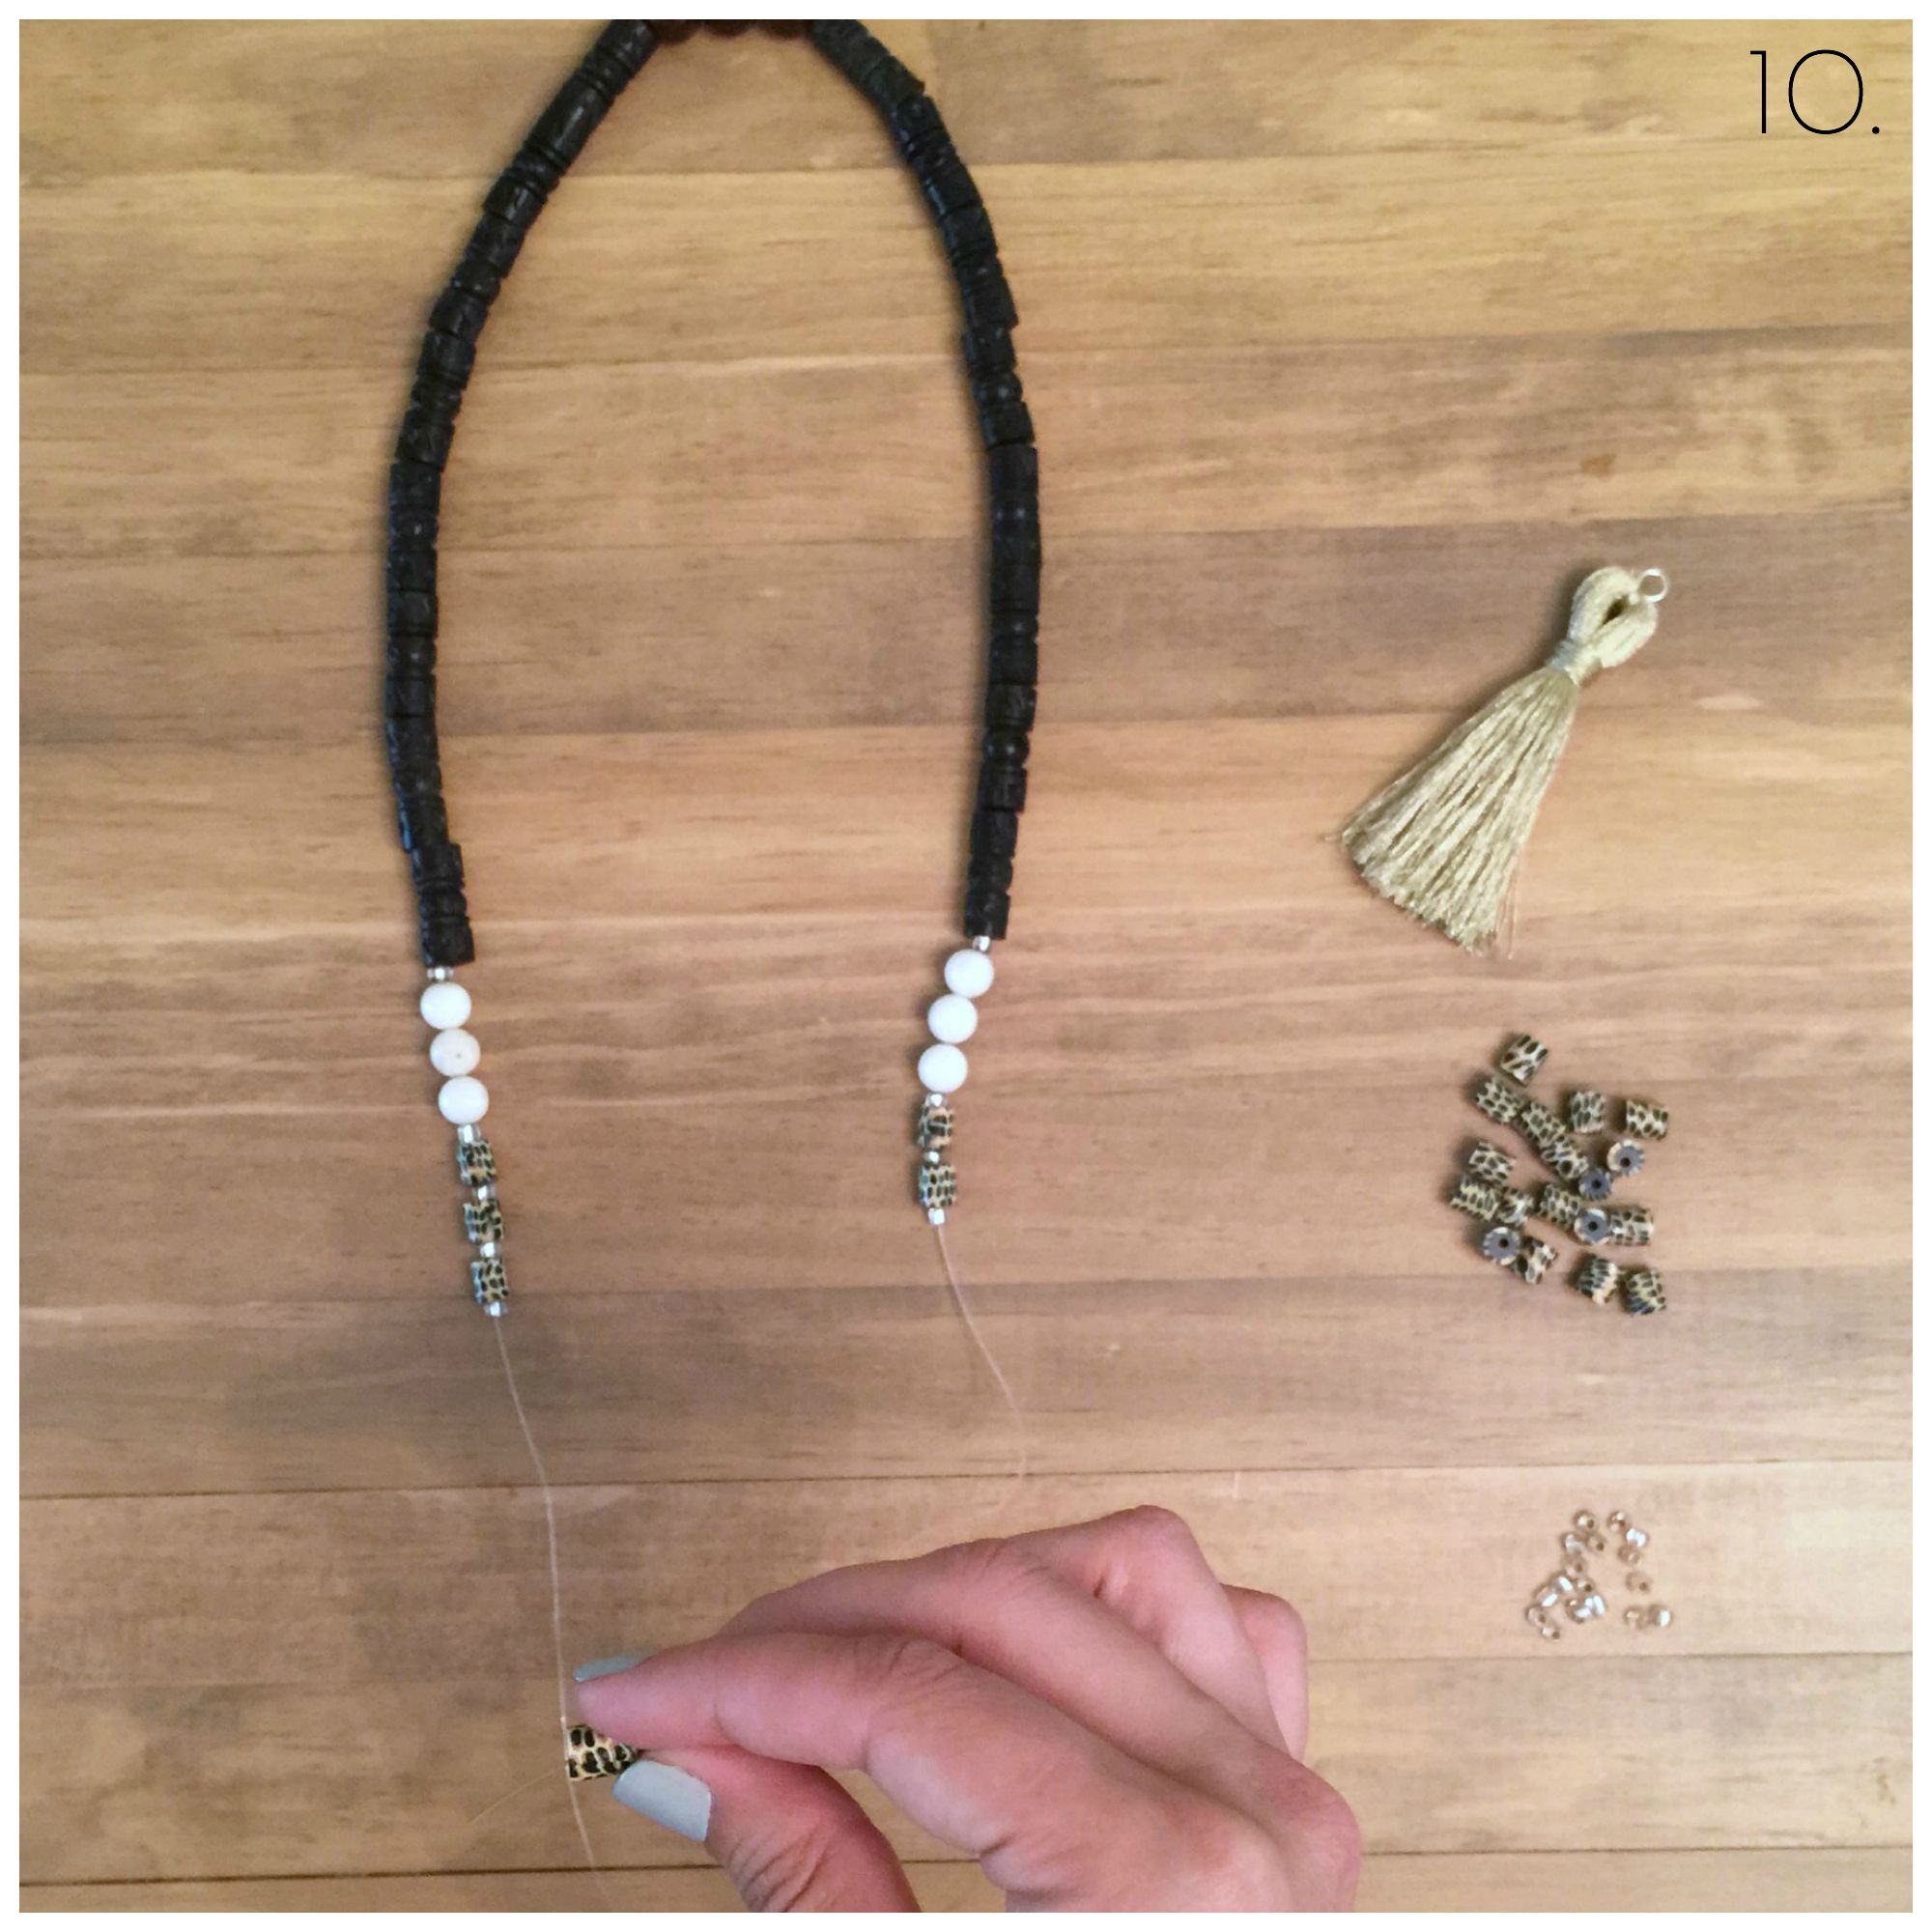
Step 10: Cut a piece of jewelry cord to be several inches longer than the desired length of your necklace. You can decide how long or short to make it, but I always find it best to physically put the jewelry cord around my neck before cutting it. The middle of the cord is going to be the back of the necklace, so start beading the cord from the back forward. It is hard to give an exact number of beads needed because they come in different shapes and sizes, and some packages come with one strand, while others come with two.
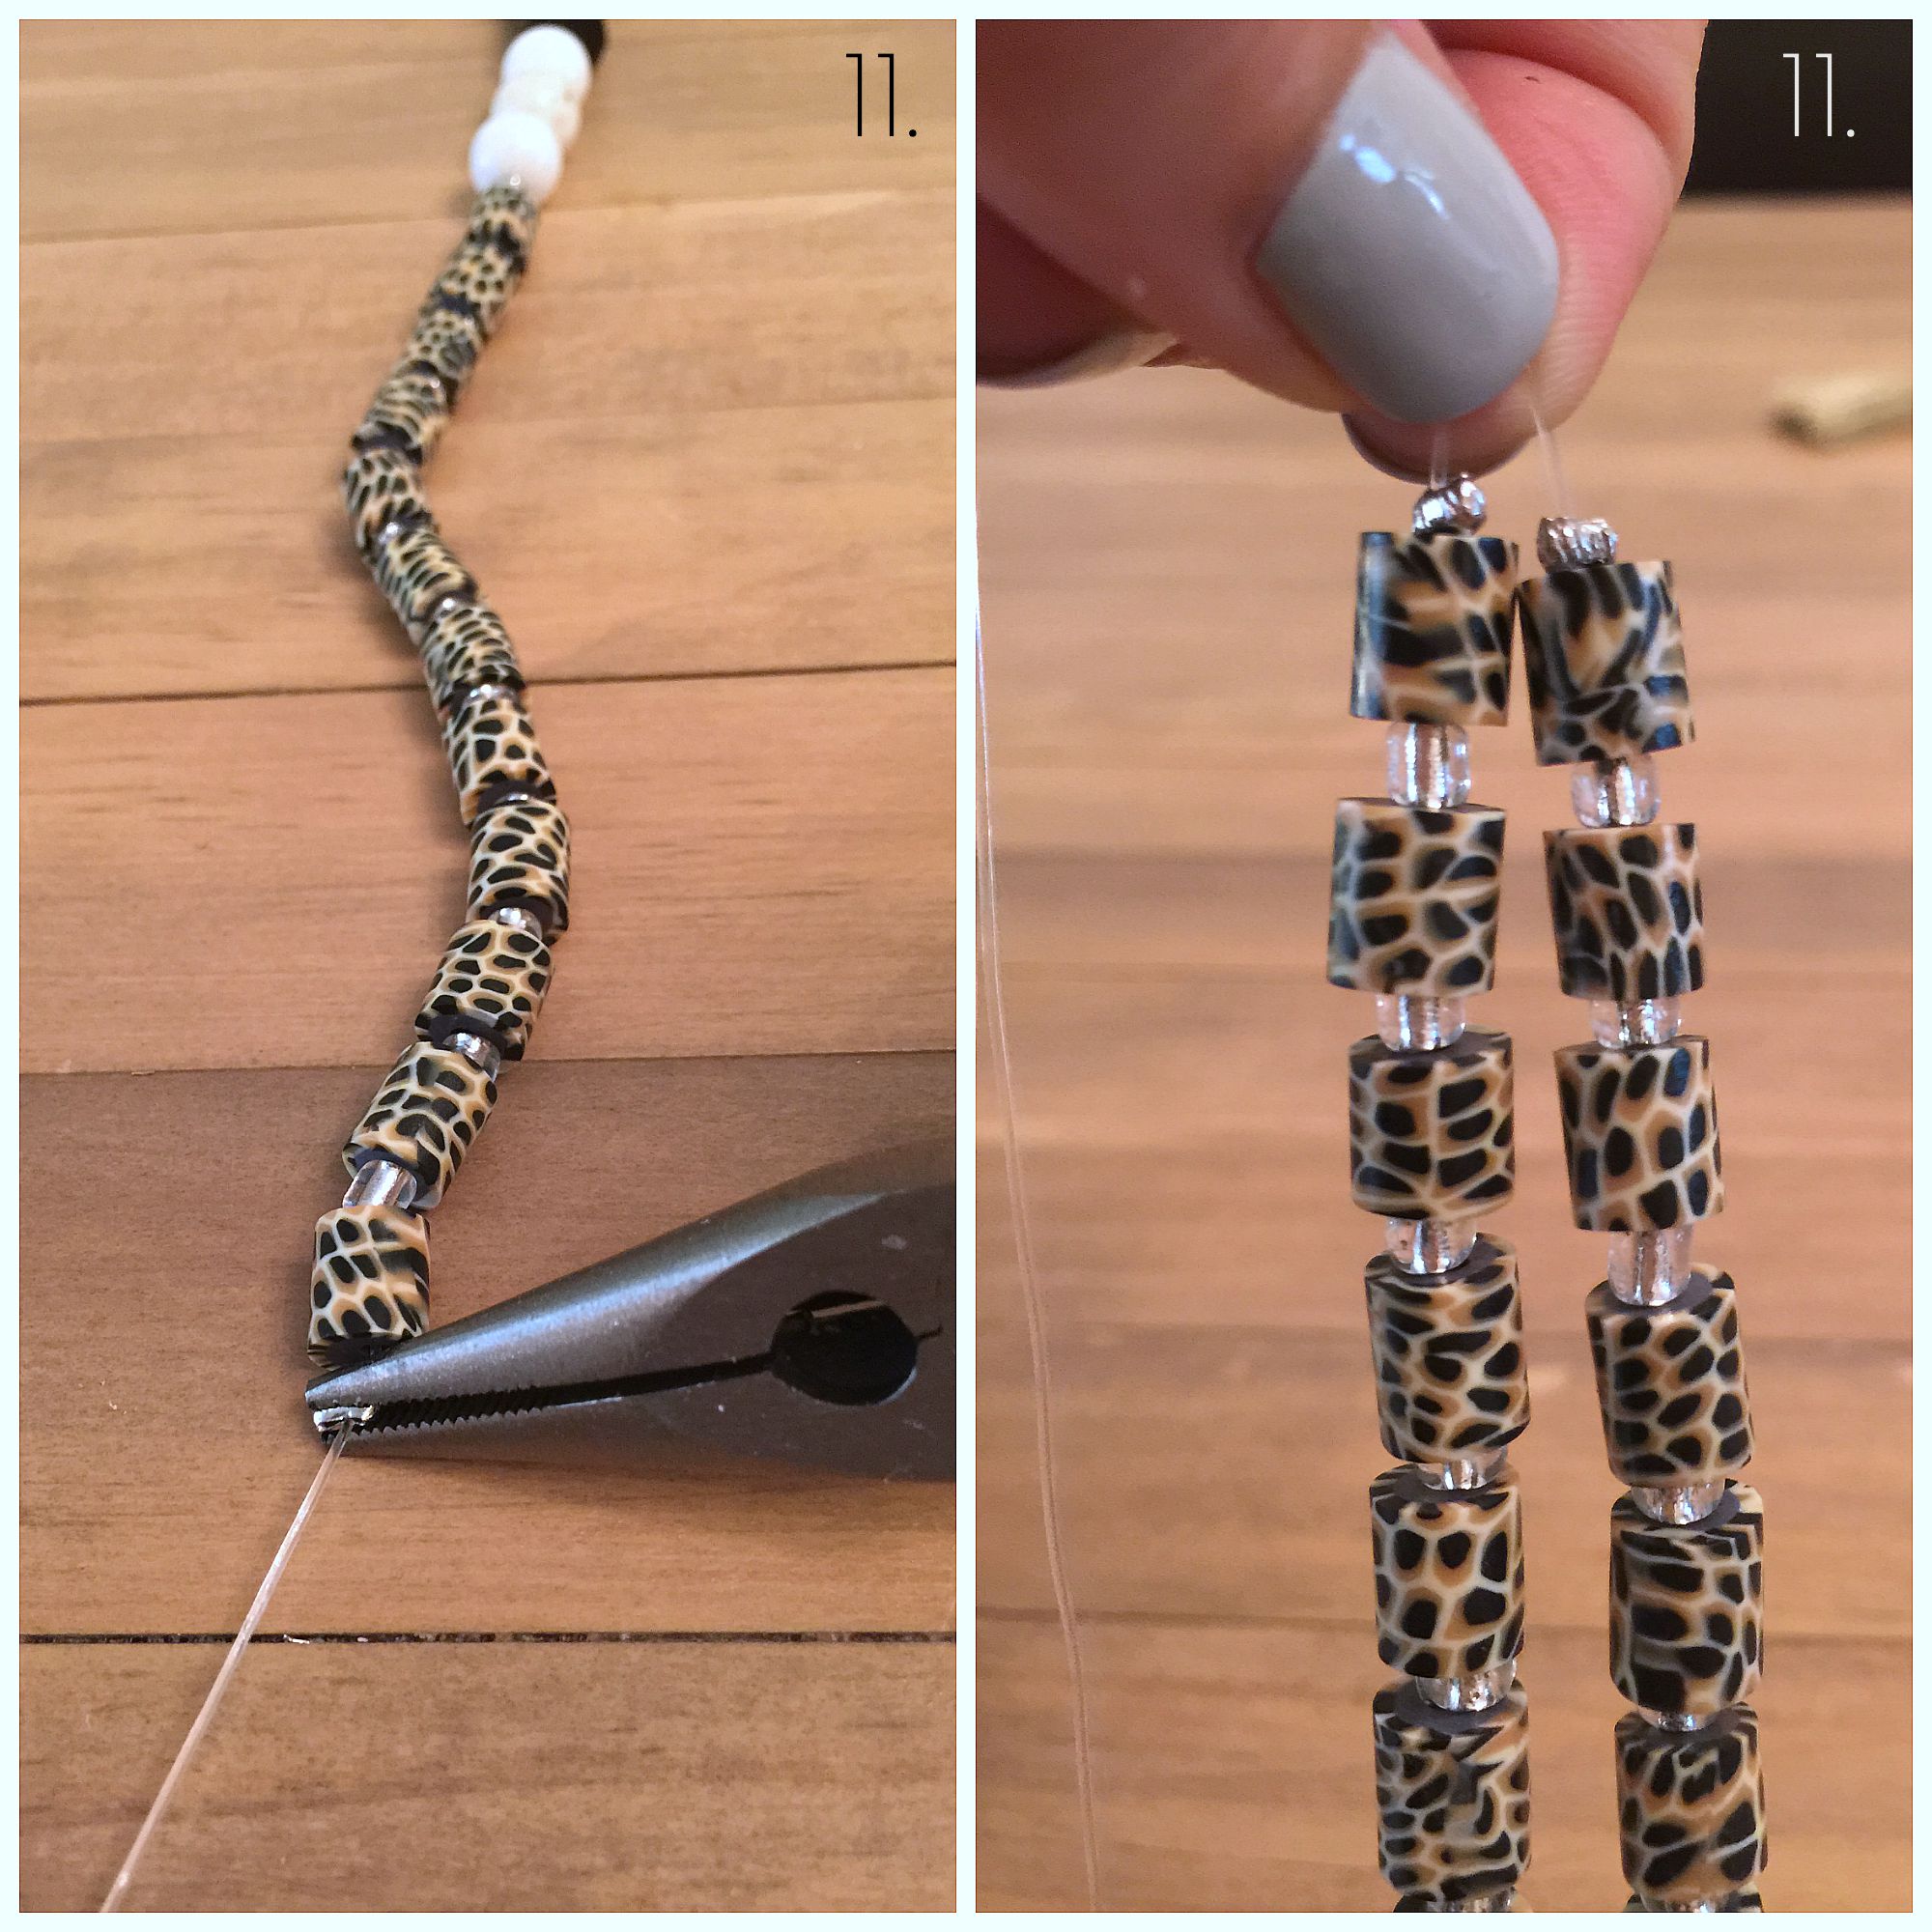
Step 11: Take one of the crimp beads and place it next to the last bead you just strung. With the pliers, squeeze the crimp bead as tightly as possible so the jewelry cord can’t budge. Before doing the same on the other side, hold the entire cord at the top [where there is no crimp bead], and let gravity do its job. You want the beads stacked on top of one another, as closely as possible, and place each crimp bead so that the cord doesn’t show. If you fasten your crimp bead and realize it’s not close enough to the bead, you can use the pliers to clamp on the opposite side of the crimp bead, which will open it back up and allow you try again.
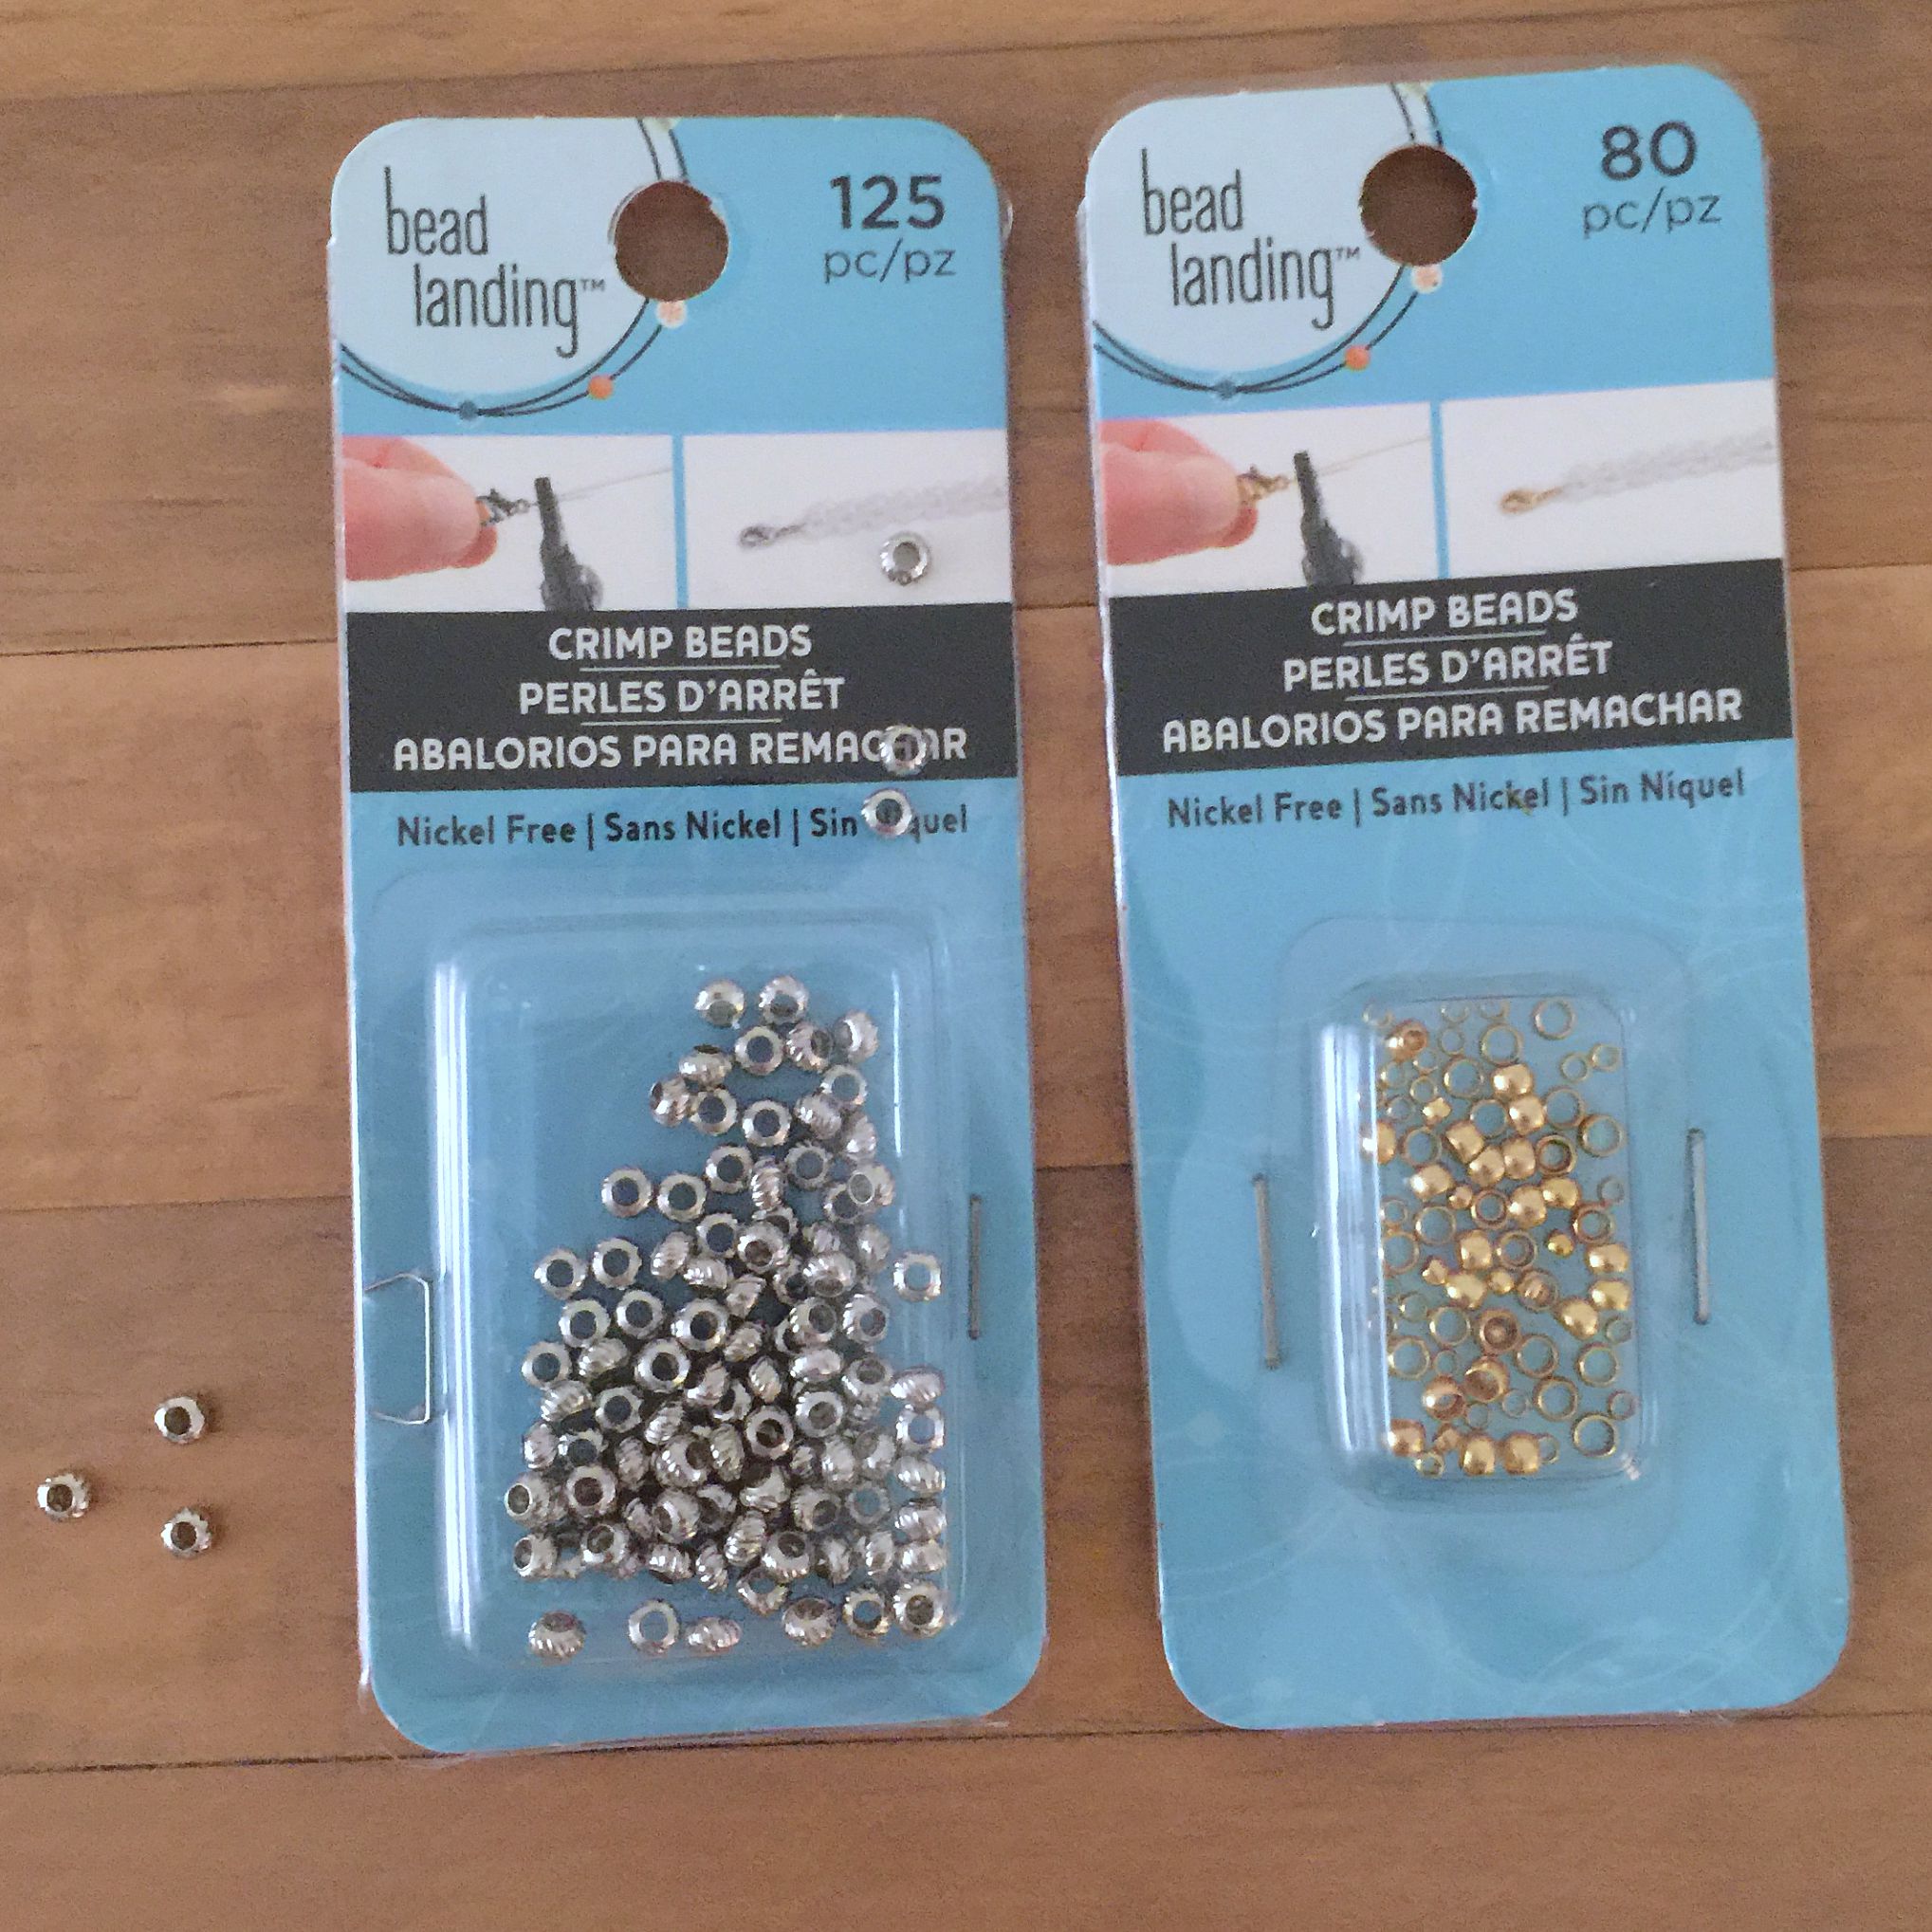
When purchasing crimp beads, make sure they’re not too small. You will be amazed by the different options available. When I attempted to make these necklaces, I made the mistake of getting tiny crimp beads and the jewelry cord was too thick for it. You want to get a crimp bead that will be as large as double the jewelry cord thickness.
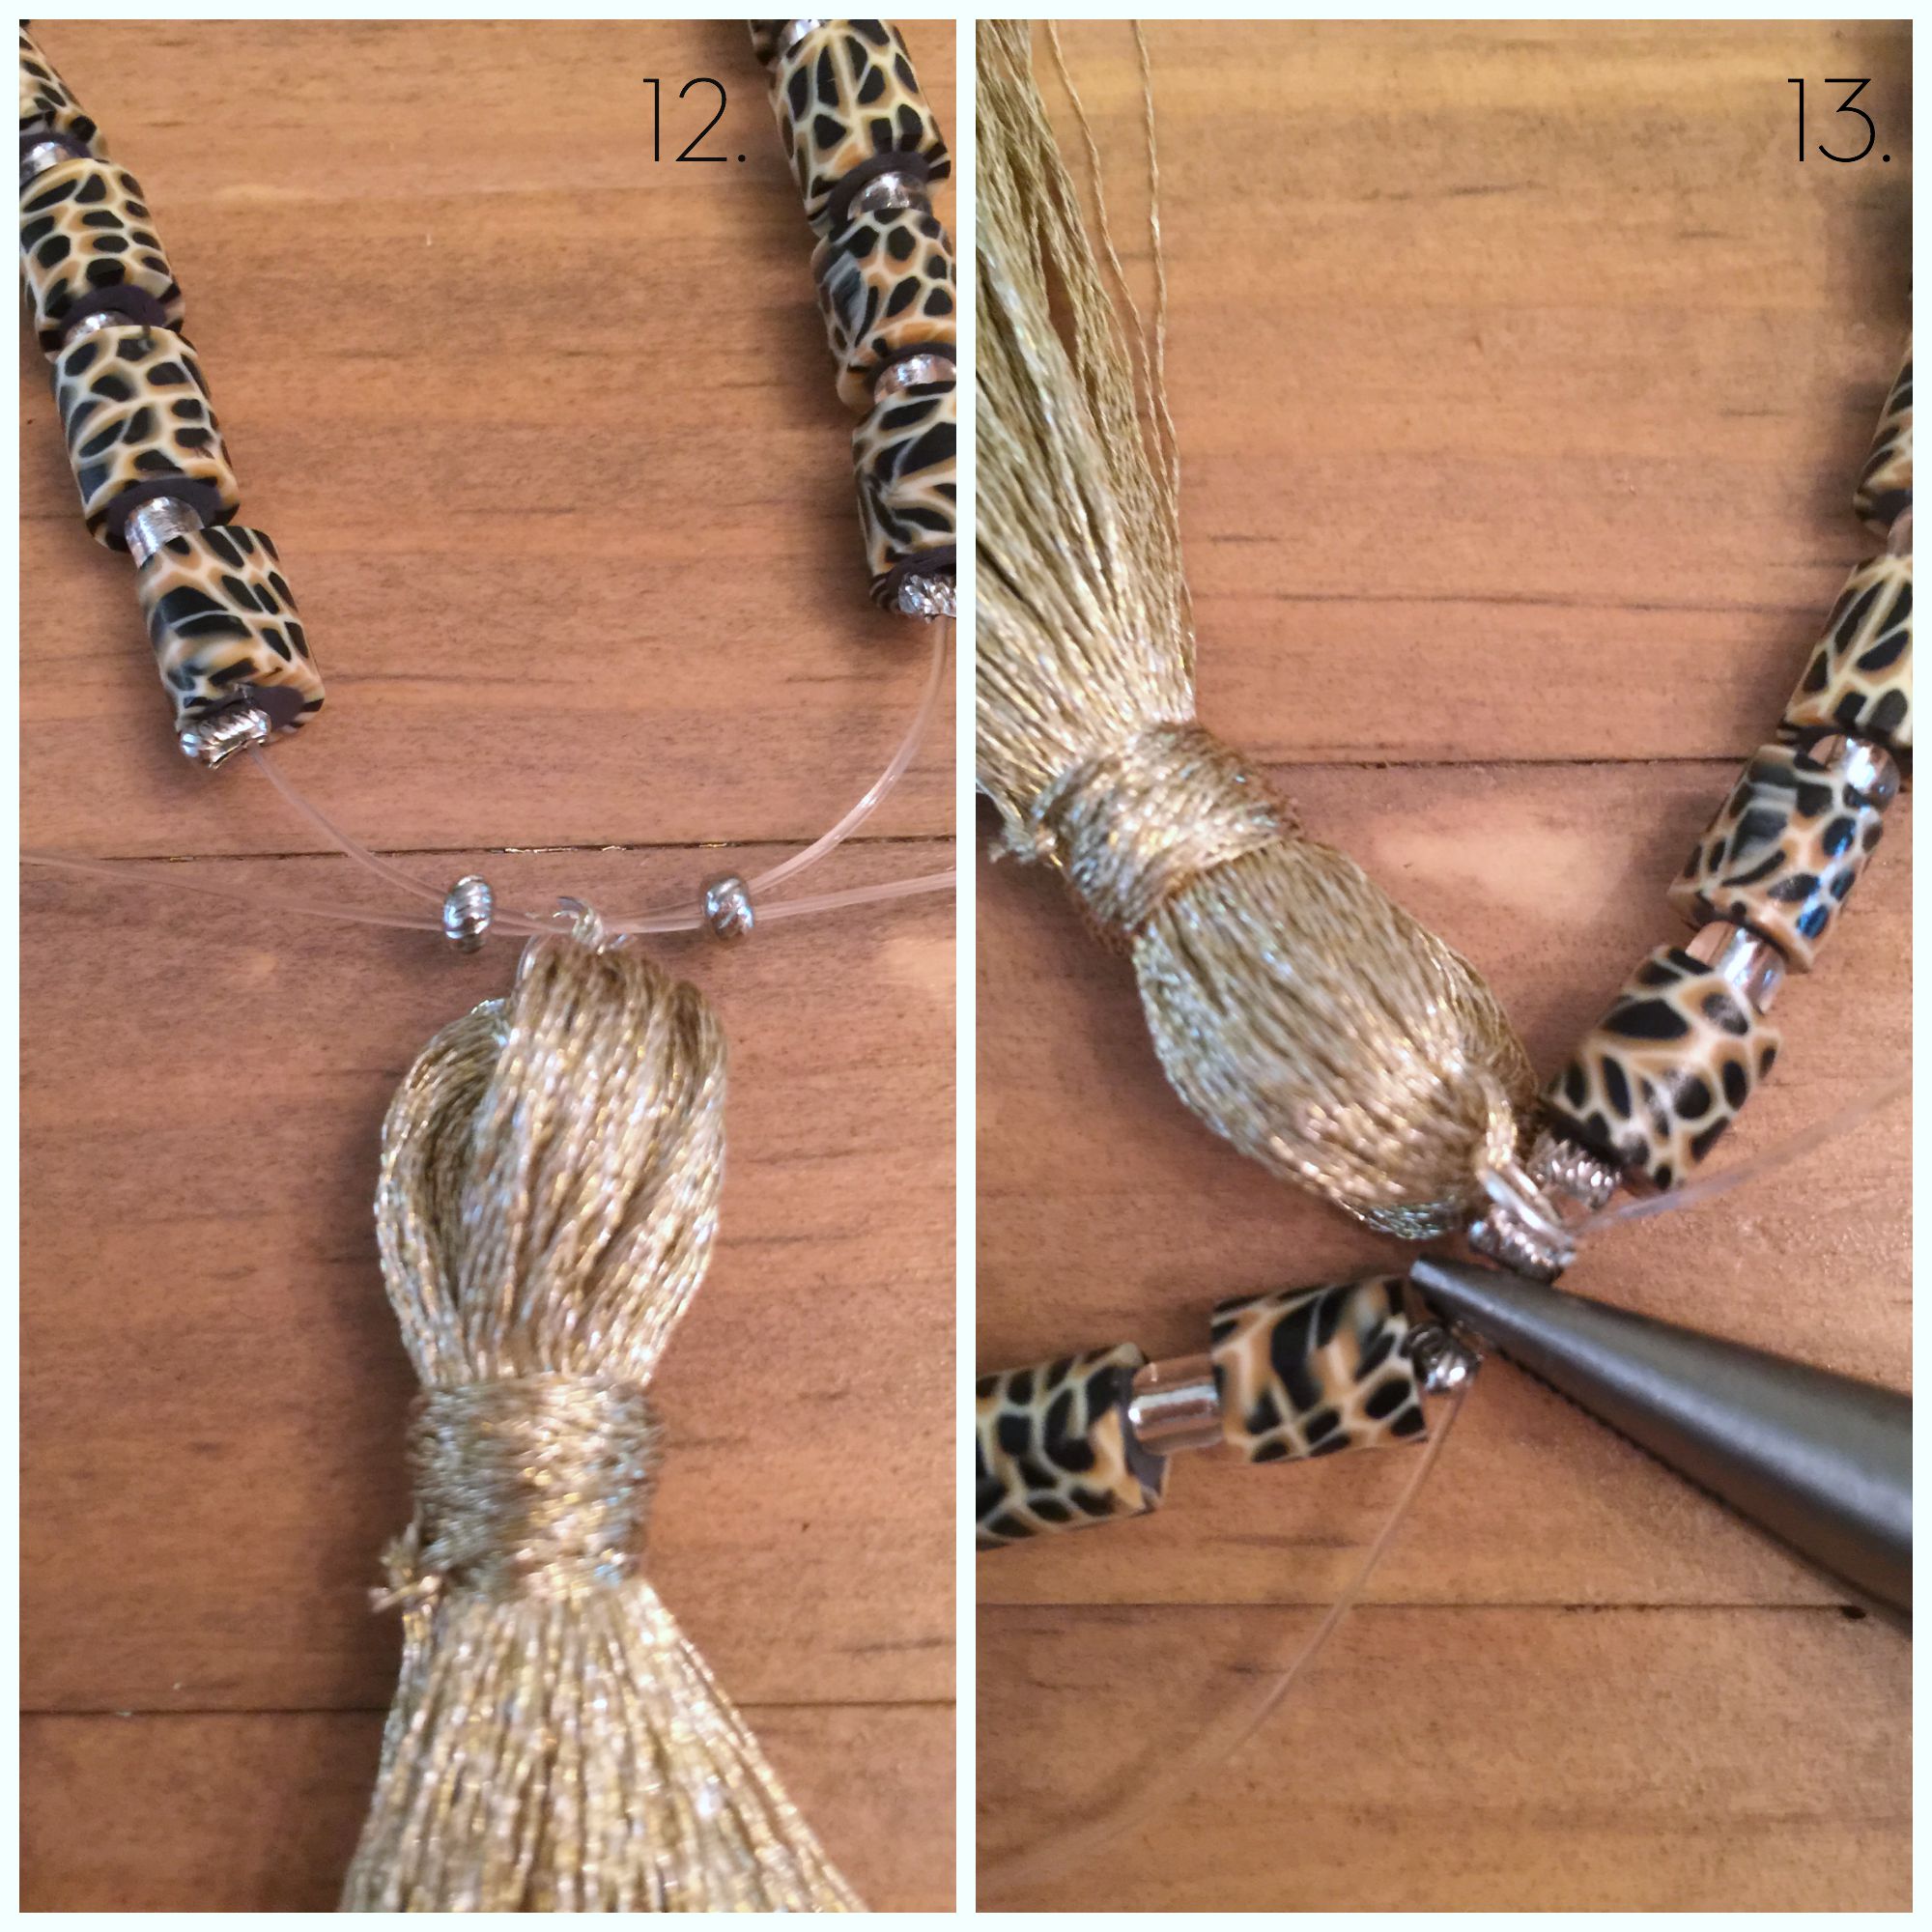
Step 12: Take two crimp beads and place them on either side of the cord, underneath the crimp beads you’ve already fastened. Place the tassel next on the jewelry cord [doesn’t matter which side]. Take both ends of the jewelry cord and string them in the crimp bead located on the opposite side.
Step 13: Pull both ends of the cord tightly to close the necklace and clamp the crimp beads on either side using the pliers. You want the cord to show as little as possible. Cut the excess cord.
VOILÀ!!!
I hope these instructions were easy to follow and I would absolutely love to see your final product! You can send me a direct message on Instagram or even better, post a picture of your necklace and tag me @jaime_cittadino!
If you love tassel necklaces, but don’t have the desire to make them – or just need a little inspiration, check these out:
Interested in more tutorials? Send me an email or comment below with suggestions and recommendations!



Gorgeous! I want ten! Haha!